Reading a Weaving Draft: A Beginner’s Guide to Threading and Treadling Diagrams
October 29, 2026 - Weaving
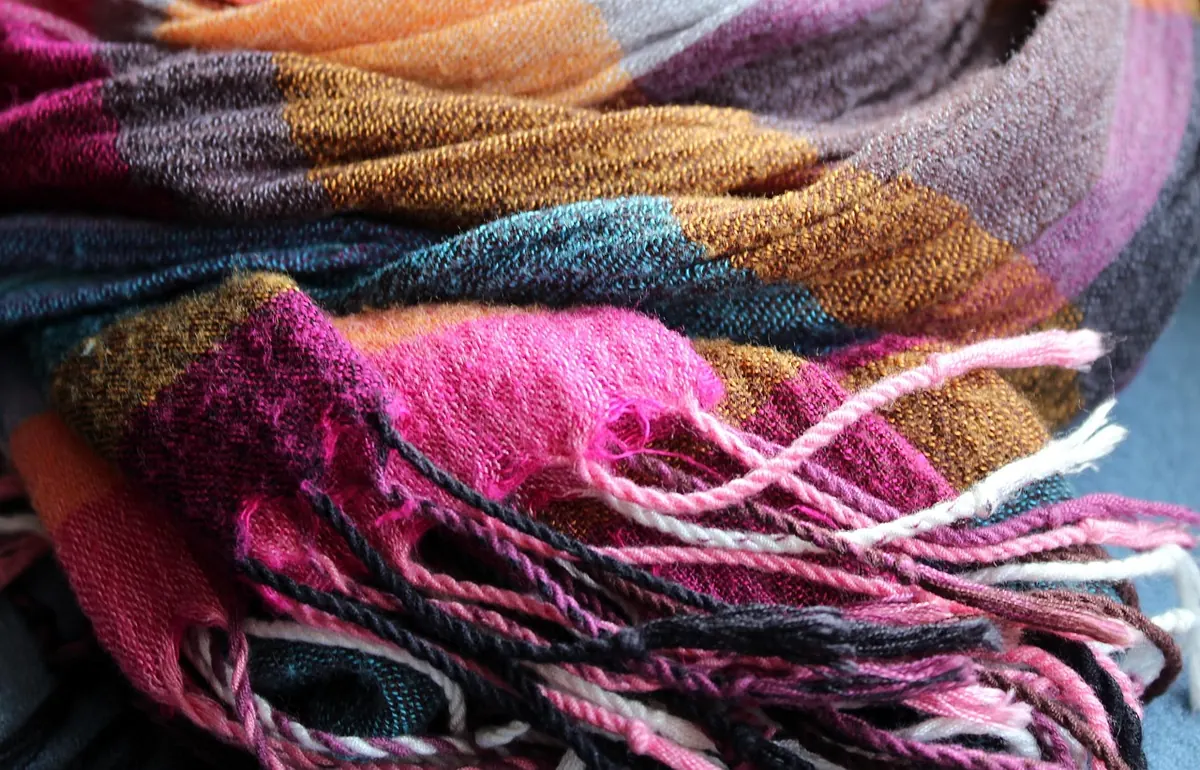
The loom is empty, the scarf is cut off the apron bar, and it already looks like a scarf. It isn't one yet. The cut ends are fraying as you watch, the cloth is still stiff with loom state, and the selvedges are pulling in a way that will look worse after the first wash. What you do in the next hour or two decides whether this piece becomes the scarf someone reaches for every morning or the one that stays folded in the drawer with the ends slightly ragged.
There are three routes from cut-off to wearable: twisting a fringe, hemming the ends, or letting wet-finishing do the work. They are not interchangeable, and they are not equally fast. Here is how they actually compare.
Twisted fringe is the most traditional finish and the most time-hungry. It also hides more sins than anything else on this list: slightly uneven weft, a selvedge that wandered on the last few picks, a yarn that frayed. Nobody looks at a firm, even twisted fringe and asks about your weft density.
The economics are simple. Fringe is warp, so you have to plan for it: allow six to nine inches of extra warp per end, plus take-up, and weave a header in plain weave so the cloth has something solid to twist against. That extra warp feels wasteful until you see the finished scarf.
Fringe suits medium to heavy yarns with some tooth: wool, alpaca, cotton, thick-and-thin, plain weave, simple twills, waffle and honeycomb. Slippery silk or a fine bamboo singles will untwist unless you add a second half-hitch or catch the knot base with a few stitches of matching thread. Smooth, drapey cloth is usually better hemmed — a heavy fringe on a light, fluid scarf pulls the whole thing out of balance.
Hemming is faster than twisting and gives the tidiest result, but it demands planning. Weave a header of at least half an inch of plain weave at each end, then allow roughly two inches of warp for a double-turned hem. Where fringe spends warp, hemming spends weft and thread, and it only really works on cloth that is dense enough to hold a seam without pulling.
For a hand-sewn hem, stay-stitch a line a quarter inch from the cut edge to stop ravelling, press, turn under a quarter inch, then turn again to your finished depth and slip-stitch with a fine needle and matching silk or cotton thread. A visible running stitch in a contrasting colour is a legitimate design choice — just keep the spacing even.
Machine hems are quicker and hold up better in repeated washing, but handwoven cloth shifts. Use a walking foot, a fine needle, and a slightly longer stitch length, and sew a strip of tissue paper underneath if the cloth wants to creep. A straight stitch close to the fold plus a narrow zigzag over the raw edge is sturdy; a blind hem is nearly invisible but takes as long as hand-sewing.
Reach for hemming on fine silk, tencel and bamboo; on high-sett cloth; on twills and lace weaves such as huck or Bronson where the pattern is the point and a fringe would compete. It also rescues scarves where the fringe would end up too short to look deliberate.
Strictly speaking, wet-finishing is not the third option alongside the other two — every scarf you make should be washed, whether it ends up fringed, hemmed or neither. It is on this list because it does more per minute spent than anything else, and because for fulled wool it is the finish rather than a step towards one.
Fill a basin with lukewarm water and a little mild soap, never detergent. Submerge the scarf and let it soak for fifteen or twenty minutes without poking at it. Lift it supporting the weight with both hands, rinse at the same temperature, roll it in a towel, and dry flat, reshaping the width while it is damp.
Same temperature in, same temperature out. A cold rinse on warm wool is how scarves felt by accident.
For wool that should full, work warmer water and gentle agitation, and check the cloth every minute — fulling cannot be undone. Fulled wool can be left with cut ends and no fringe at all, since the fibres lock into a firm edge, though that edge will feel harder than the body of the scarf. If you are twisting a fringe, wet-finish first, twist when dry, then steam the fringe lightly to straighten the kinks.
In rough terms, twisting takes an hour or more per end and rewards you with the most robust edge, provided the knots are snug. Hemming takes twenty to forty minutes and gives a tailored, quiet finish that survives the washing machine better than most people expect. Wet-finishing takes half an hour of mostly waiting and improves everything it touches: the cloth softens, the pattern blooms, the selvedges settle.
Whichever route you take, the sequence matters more than the technique. Weave a sample, wet-finish it, and measure the shrinkage before you plan the real warp. Weave headers if you intend to hem. Cut off, secure any raw edges, then wash and dry flat. Only then hem or twist, press the finished edges, and leave the scarf somewhere flat for a day before it goes into a drawer. Do the washing last and you will spend an evening untangling fringe you had already knotted.
Photo: _Alicja_ / Pixabay
A weaving draft is four connected diagrams, not a code. Here is how threading, tie-up, treadling and drawdown...
A daily twenty-minute weaving habit gives your week a fixed point of calm, plus practical setup advice so short...
Copyright © 2026 Telaio Sottovoce. All Right Reserved.